

There is one enemy that every RV owner fears above all others—water. And your roof is the only thing standing guard, protecting your entire investment from the elements.
Sooner or later, every owner of an aging coach stands at a crossroads, facing a critical and costly decision. Is a simple roof coating enough to add a few more years of life, or is it time for a full replacement?
This is a major financial question. Industry-wide, water damage is consistently the single most expensive type of RV repair, making this choice one of the most important you’ll face.
This RV roof coating guide is designed to cut through the online noise and the conflicting forum advice. We’ll give you a clear framework to make the smartest, most cost-effective choice for your specific RV.
What Are My Real Options? A Head-to-Head Look
Option 1 — The Protective Shield (A Roof Coating)
When it comes to your RV’s aging roof, you really have two paths. Think of the first, a roof coating, as a protective shield. It’s a liquid-applied membrane designed to roll right over your existing, structurally sound roof to seal minor imperfections.
Most of these coatings are either acrylic, known for their durability, or silicone, prized for their fantastic water resistance and ability to go on in a single, thick coat.
Option 2 — A Complete Reset
The second path is a full replacement. This is a far more involved process. It means a complete removal of the failing membrane, a thorough inspection and repair of the underlying wood substrate, and the professional installation of a brand-new EPDM or TPO rubber roof.
Making the Choice
So, how do you decide? A coating has a significantly lower upfront cost, making it a great choice for proactive maintenance. A replacement, however, is a major investment that completely “resets the clock” on your roof’s lifespan, often for ten years or more.
When to Coat vs. When You MUST Replace
Good Signs for a Coating
You are a great candidate for a roof coating if what you’re seeing is primarily cosmetic aging. Look for a chalky residue on the membrane, some fading, or even very fine, surface-level cracks that look a bit like alligator skin.
If the underlying membrane is still fully bonded and intact, a coating is a fantastic way to add years of life to your roof, no matter the type of your Class A, B, C, or trailer.
Red Flags for a Replacement
Now, let’s talk about the deal-breakers. If you see deep cracks, actual tears in the rubber membrane, or areas where it is physically shrinking and pulling away from the edges, a simple coating won’t solve the problem.
You have a more serious issue that needs to be addressed with a replacement. You can get more information about water damage by reading our blog post here.
The Unmistakable Warning Sign
But the number one, non-negotiable sign that you need a full replacement is a “soft spot.” If you carefully walk on your roof and feel any sponginess underfoot, stop. That feeling is the plywood substrate beneath the membrane, which has begun to rot from water damage, and a coating cannot fix a structural failure.
When in Doubt, Get an Expert Opinion
The line between cosmetic aging and a structural problem can be tough to see with an untrained eye. If you have any doubt, especially if you think you might feel a soft spot, the smartest investment you can make is a professional inspection.
The technicians at Leisure Coachworks can give you a definitive diagnosis, ensuring you don’t spend hundreds on a coating when a replacement is the only real, long-term solution.
How to Apply an RV Roof Coating
Step 1. The Deep Clean
A successful coating application is 90% preparation, and that starts with meticulous cleaning. You need to remove every trace of dirt, chalky residue, and grime to ensure the new coating can bond properly. Start with a high-quality, purpose-built RV roof cleaner to do the heavy lifting.
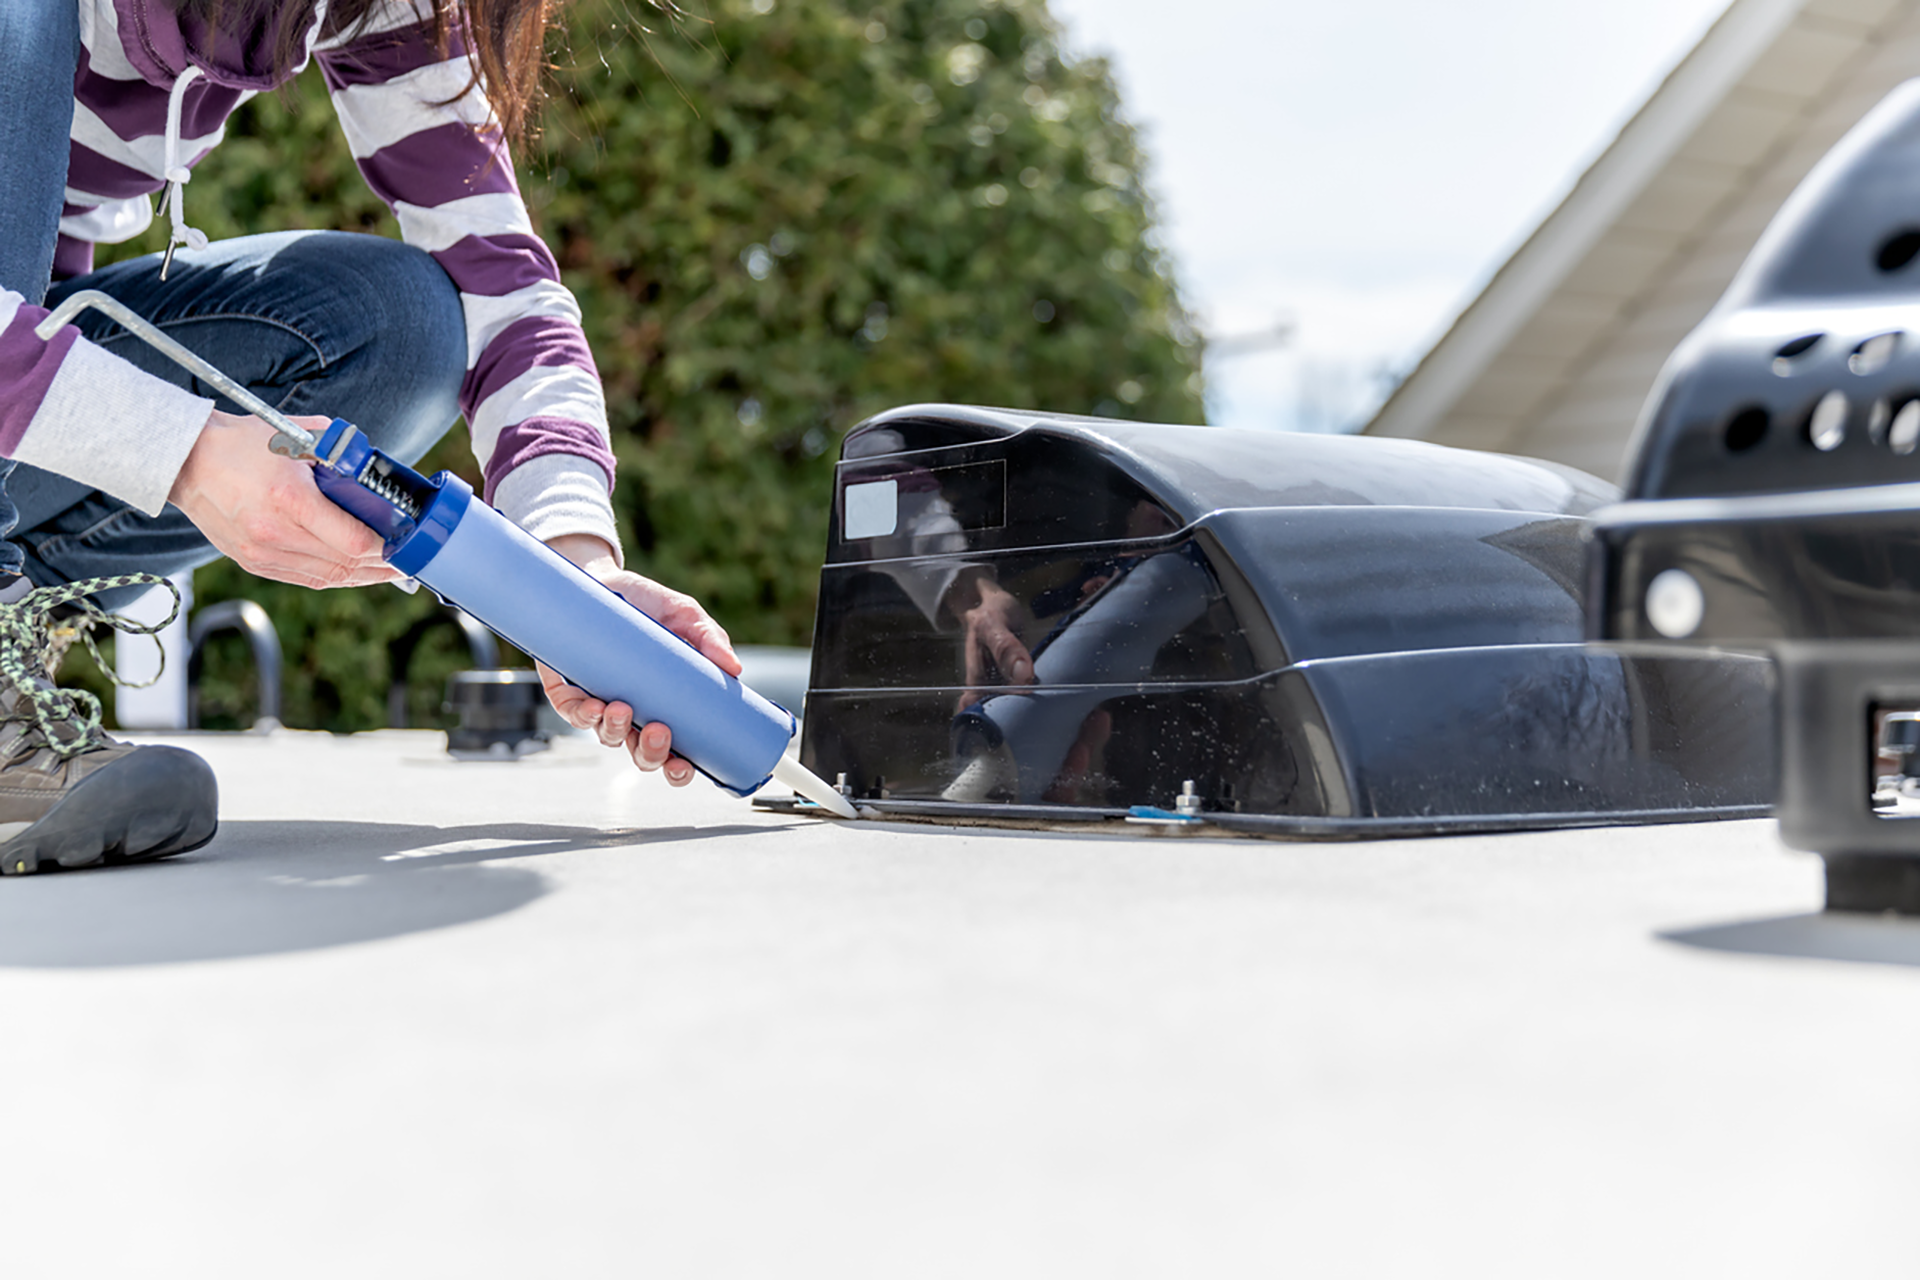
Step 2. Seal Every Seam
Once the roof is perfectly clean and dry, you must inspect every single inch of sealant on that roof—around every vent, seam, and fixture. Any old, cracked, or peeling sealant must be carefully scraped away.
And pay close attention—if a previous owner used any silicone-based caulk, it must be completely removed, as nothing will stick to it.
Why the Right Sealant Matters
Reseal every seam with a compatible, high-quality lap sealant. For EPDM and TPO rubber roofs, Dicor Self-Leveling Lap Sealant is the undisputed industry standard and the only product our professional technicians trust. A new coating is only as good as the sealed surface beneath it.
Step 3. “Flashing” the Seams (The Pro Technique)
Before you start rolling the main area of the roof, do what the pros do—”flash” your seams. This means using a brush to apply a thick, dedicated first coat of your coating material in a 4- to 6-inch-wide band over every single seam you just resealed.
Letting this layer cure first creates a double-thick, seamless barrier at all the roof’s most vulnerable points.
Step 4. Applying the Field Coats
Now you’re ready for the main event. Using a 3/8-inch nap roller, apply your first coat of the RV roof coating across the entire “field” of the roof. To ensure you get a thick, even layer, apply the second coat in a direction that’s perpendicular to your first.
Most importantly, respect the manufacturer’s recommended curing time before exposing the roof to rain.
Preserving Your RV’s Resale Value
It’s easy to look at roof maintenance as just another cost, but it’s more accurate to see it as an investment in the long-term value of your asset. A well-maintained roof is the single most important factor in preventing the kind of water damage that can devastate an RV’s value.
What the Experts Say
According to the NADA RV Appraisal Guide, the official resource used by dealerships, “condition” is a primary driver of an RV’s worth. A clean, well-maintained, or recently replaced roof is one of the most powerful signals to a potential buyer that your coach has been properly cared for.
Your RV Roof, Your Choice, Our Expertise
Tackling a roof coating project yourself is a rewarding way to protect your investment. From professional-grade cleaners to the industry-standard Dicor lap sealant and the coatings themselves, the Leisure RV Parts online store has every authentic, pro-grade product you need to get the job done right.
If reading through this guide makes the job seem too big, or if you’ve diagnosed a deeper issue that requires a full roof replacement, trust the masters.
The factory-trained technicians at Leisure Coachworks specialize in creating a flawless, guaranteed, leak-proof seal that completely resets the clock on your roof’s lifespan. Contact us today for a professional inspection and the ultimate peace of mind on the road ahead.